
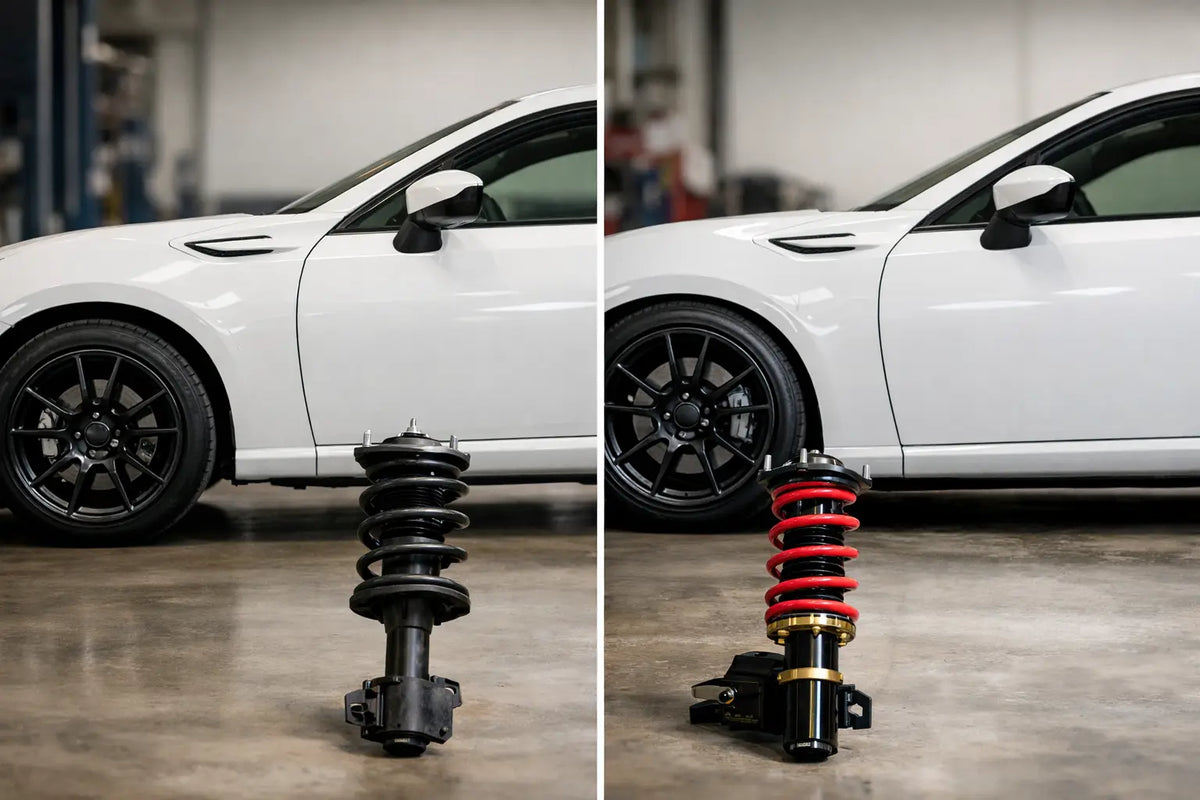
Your first drive on coilovers should not be judged by the car sitting 40 mm lower on the driveway. A useful before after coilover installation comparison starts with what the car did under braking, turn-in and acceleration before a spanner touched it. The visual change is immediate. The handling gain only arrives when the spring rates, damping, ride height and geometry work as a package.
For a fast-road build, a track-day hatch or a properly focused street car, coilovers can deliver more control, better wheel fitment and a much more connected chassis. They can also create bump steer, tyre rub, a harsh ride and unpredictable grip when they are fitted or adjusted without a plan. Here is what should genuinely change, what should be measured, and what needs setting up after the install.
Before coilover installation: establish a baseline
A car on tired original dampers can feel transformed by almost any fresh suspension. That does not mean every improvement comes from lowering it. Before fitting coilovers, take note of how the car behaves on a familiar route. Does it float after a crest, squat excessively under power, dive heavily into corners or skip across broken tarmac? Those details tell you whether you need firmer control, more travel, different tyres or a broader chassis setup.
Measure ride height at all four corners from the wheel centre to the arch lip. Measuring from the ground introduces tyre-pressure and wheel-diameter variables. Record the current wheel and tyre size, tyre pressures, alignment settings and any existing rubbing points. Take clear photos of the wheel-to-arch gap and check the condition of top mounts, drop links, control-arm bushes and ball joints while access is easy.
This baseline matters when the car has a mixed role. A BMW used for motorway miles and occasional track days needs different priorities from a Honda Civic built around sticky tyres and kerb-heavy circuit use. Coilovers are adjustable, but adjustment is not a substitute for choosing a kit with sensible spring and damper valving for the platform.
What changes after coilover installation
The obvious before-and-after difference is ride height. A lower centre of gravity can reduce body movement, sharpen the visual stance and help fill the arches correctly. But lower is not automatically faster. Once the suspension runs out of bump travel, the car hits bump stops more often. At that point, it can feel stiff while actually losing compliance and mechanical grip.
A well-selected coilover kit should make the chassis settle sooner after a bump, remain flatter through direction changes and give the driver a clearer sense of front-end bite. Steering response often feels more immediate because body roll and pitch are better controlled. On a smooth circuit, that can translate into more confidence carrying speed into a corner.
On a poor B-road, the result depends on damping quality and available travel. Cheap or badly adjusted coilovers can make the car busy, crashy and less composed than healthy OEM suspension. A quality kit from a recognised manufacturer is generally engineered around the vehicle’s axle loads and suspension architecture, but it still needs to be installed at a sensible height and tuned for the road surface you actually drive.
The ride-quality trade-off
Stiffer springs do not simply mean a harsher car. Correctly matched spring and damper rates can control movement without making every expansion joint feel violent. The problem starts when spring rate is excessive, damping is wound to maximum, or ride height is dropped beyond the useful range.
For road use, start close to the damper manufacturer’s recommended settings. If the car rebounds too quickly after a dip, add a small amount of rebound control. If it feels like it cannot absorb sharp edges, reduce damping rather than assuming more stiffness is the answer. Make one adjustment at a time, in small, recorded increments, and test it on the same stretch of road.
Wheel clearance and stance
Coilovers often open the door to a more aggressive wheel and tyre package, particularly on platforms such as the VW Golf, Audi S3, Toyota GT86 and BMW 3 Series. That makes clearance checks essential. A car that clears the tyre at static ride height may still rub under compression, lock or full load.
Check the inner tyre against the spring perch, strut body and arch liner, then check the outer shoulder against the wing under steering lock. Wheel offset, tyre section width and actual tyre shape all matter. A 235-section tyre from one manufacturer can sit noticeably wider than another, so do not build around a number alone.
Alignment is the real after-installation job
Any meaningful change in ride height changes alignment. This is where many coilover installs lose their potential. Lowering can add negative camber, alter toe and move the control arms away from their intended operating angles. A car may turn in sharply after the install but chew through tyres or feel nervous at speed because the toe is wrong.
Book a proper four-wheel alignment once the suspension has settled. On many cars, a short bedding-in period followed by a recheck is worthwhile, especially if the ride height is adjusted again. Tell the alignment specialist how the car is used. A daily-driven car needs stable, tyre-friendly settings; a track car may benefit from more negative camber and a more focused toe setup, provided the tyres and driver can use it.
Do not chase alignment figures copied from another build without context. The same settings can behave differently with different tyre compounds, wheel widths, anti-roll bars and driving style. If you run adjustable top mounts, use the extra camber range with a target in mind, not just because it is available.
Corner weighting for serious track builds
On coilovers with independent height adjustment, corner weighting is the next step for cars that see regular circuit work. It balances the load distribution across the wheels with the driver, fuel level and typical track configuration considered. The result is a more predictable car under braking and through left-right transitions.
Corner weighting is not necessary for every road car. It is valuable when lap consistency matters, when the car has fixed-back seats or other weight changes, or when you have invested in tyres, brakes and alignment that deserve a balanced chassis. Ride height should be set first, then corner weights refined without sacrificing practical travel or clearance.
Installation details that protect the result
A coilover install is more than removing the old strut and fitting a shiny new assembly. Brake lines, ABS wiring and sensor cables need to sit securely through full steering lock and suspension movement. All fasteners should be tightened to the vehicle manufacturer’s torque specification, and rubber-bushed suspension arms should be tightened at normal ride height where applicable. Tightening them while the suspension hangs can preload the bushes and shorten their working life.
Inspect bump stops, top mounts and bearings rather than automatically reusing worn components. Some coilover kits include top mounts; others are designed around the original parts. Confirm exactly what the kit supplies for your vehicle before starting. Fitment accuracy matters as much as brand choice, particularly where models share a chassis name but use different front struts, rear spring arrangements or electronic damper systems.
After installation, recheck every locking collar, mounting fastener and wheel bolt after the first heat cycle and a short drive. Listen for knocks on low-speed steering inputs and over small bumps. Most new noises come from loose hardware, incorrectly seated springs, worn drop links or lines touching the suspension, not from the coilovers themselves.
Road checks after fitting coilovers
The first few drives should be deliberate. Start with gentle braking, full-lock manoeuvres and a route that includes smooth road, rough road and a few controlled direction changes. Watch for tyre contact, steering pull, vibration and any warning lights. If the car has adaptive dampers, make sure the chosen kit includes the correct cancellation solution or retention hardware where needed.
Also consider the practical consequences of the new height. Steep car parks, speed humps, ferry ramps and workshop lifts become part of ownership. Check headlamp aim after lowering, and tell your insurer about the modification. A clean install should improve the car without turning normal driving into a clearance calculation at every junction.
Torque Lab’s suspension range is built around platform-specific performance parts, so the right starting point is always your exact vehicle, intended use and wheel-and-tyre plan. The best coilover setup is rarely the lowest or the stiffest one. It is the one that gives your car more control, more confidence and enough usable travel to work hard on every road or circuit you ask of it.