
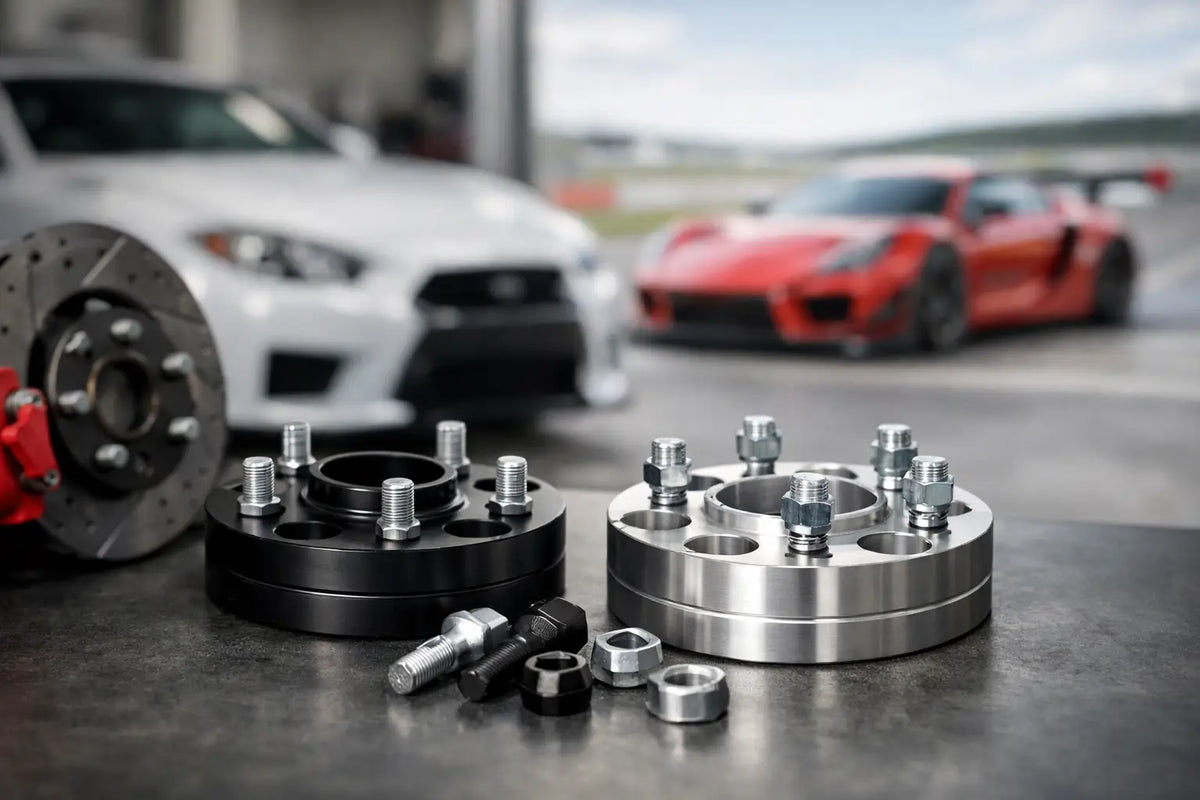
A spacer that gives your wheels the right stance can also solve genuine clearance issues - but only when it is treated as a fitment component, not a cosmetic shortcut. Knowing how to choose wheel spacers safely means matching the spacer to your hub, wheel, fasteners and intended use before you even think about how flush the tyre looks.
On a road car, a poor-quality or badly fitted spacer can create vibration, damage threads, loosen hardware or leave the wheel poorly supported. On a track build, those risks increase with heat cycles, kerb strikes and repeated high-load braking. Get the specification right and a spacer can be a clean, reliable part of a properly planned wheel and suspension setup.
Start with the reason for fitting spacers
Wheel spacers move the wheel outward from the hub. The obvious result is a wider track and a fuller look in the arch, but the practical reasons matter more. You may need caliper clearance for a brake upgrade, room for a wider wheel design, clearance around coilover hardware, or a corrected stance after changing wheel offset.
A spacer also changes effective offset. Fit a 10 mm spacer to an ET45 wheel and its effective offset becomes ET35. The wheel sits 10 mm further out, which reduces inner clearance while using 10 mm more space towards the wing. That sounds simple, but it is the calculation that prevents tyres rubbing on liners, arches or bumper mounts under compression.
Do not choose thickness by eye alone. Measure the gap to the suspension and brake components on the inside, then assess outer arch clearance at full steering lock and full bump. Lowered cars, wide tyres and aggressive camber settings leave far less margin than a standard-height road car.
Confirm hub-centric fitment before spacer thickness
The hub carries the wheel concentrically. The wheel bolts or nuts clamp the assembly together, but they should not be relied upon to centre the wheel. That is why a hub-centric spacer is the correct choice for most performance applications.
A hub-centric spacer has a centre bore that matches the vehicle hub and a locating lip that reproduces the hub diameter for the wheel. For example, many VAG platforms use a 57.1 mm hub bore, while BMW commonly uses 72.6 mm. Those numbers are not interchangeable, and neither are wheel centre bores. Check your exact platform rather than trusting a make-wide assumption.
The spacer lip must also be long enough to locate the wheel properly. This is especially relevant with thin slip-on spacers. A 3 mm or 5 mm spacer may reduce the amount of factory hub lip available, leaving little or no positive location for the wheel. In that case, a thin spacer with an integrated lip, where available, or a different wheel-offset solution may be the safer route.
Avoid generic flat plates with oversized centre bores on a car that was designed around hub location. They may physically bolt on, but that does not make them a good fitment choice. A quality, vehicle-specific spacer should state its centre bore, outer spigot size, bolt pattern and hardware requirements clearly.
Choose the right spacer design and fasteners
There are two main spacer types. Slip-on spacers slide over the existing hub and use longer wheel bolts or extended studs. Bolt-on spacers fasten to the hub with their own hardware, then provide a second set of studs or threaded holes for the wheel. Neither is automatically better - thickness, vehicle design and available thread engagement decide which suits the job.
Slip-on spacers are common at smaller widths, but longer hardware is non-negotiable. The replacement bolts must have the correct thread diameter and pitch, plus the correct seat type for your wheels. Many European wheels use either a tapered cone seat or a radius ball seat. Mixing them can prevent the wheel from clamping squarely, even if the bolt appears to tighten.
Bolt-on spacers are often the practical answer at larger widths. They avoid excessively long wheel bolts and can retain correct wheel-side hardware geometry. However, they need enough thickness for the factory studs or bolts to clear the spacer body and for the wheel to seat flat. Some installations require trimming protruding studs, but only where the spacer and wheel design specifically allow it. Cutting hardware without a confirmed plan is not tuning - it is guesswork.
Before ordering, confirm these four details:
- Vehicle bolt pattern, centre bore and hub-lip dimensions.
- Wheel centre bore, bolt-seat profile and available back-pad clearance.
- Spacer thickness needed after measuring inner and outer clearance.
- Fastener thread pitch, seat type, length and the spacer manufacturer's torque specification.
Buy for load, not just looks
Wheel spacers live between two critical machined surfaces and carry the consequences of every pothole, braking zone and direction change. Material quality and machining accuracy matter. Look for spacers made from a suitable high-strength aluminium alloy, accurately machined bores and spigots, and corrosion-resistant hardware where hardware is included.
The cheapest unbranded options often provide little information on material, load capability, manufacturing tolerances or bolt grade. That is a poor trade when the part directly affects wheel retention. A recognised manufacturer with clear vehicle applications and installation instructions is worth paying for, especially on a heavier car, a high-power build or anything that sees track days.
More width is not automatically more grip, either. Increasing track width can marginally alter load transfer characteristics, but it also changes scrub radius and increases leverage on wheel bearings, hubs and suspension joints. A modest spacer chosen to clear brakes or correct a conservative wheel offset is one thing. Pushing wheels outside the bodywork for the widest possible stance is another.
For road use, keep tyres covered by the arches and consider local construction rules, MOT inspection requirements and your insurer's modification policy. If the wheel or tyre contacts bodywork at any point in steering or suspension travel, it is not a finished setup.
Test the complete setup, not just the stationary car
A wheel that clears on axle stands may rub as soon as the suspension compresses. With the car on the ground, turn from lock to lock and inspect clearance around the tyre shoulders, liners, brake hoses and suspension arms. Then check again after a short, careful road test over realistic bumps and steering inputs.
Pay attention to wheel balance symptoms. A vibration that appears immediately after fitting spacers is often a centring issue, contamination between mounting faces, incorrect spigot dimensions or a wheel that is not seated flat. Do not try to torque your way out of a vibration. Remove the wheel and inspect the fitment.
Installation discipline is part of safe spacer selection. Clean rust, paint flakes and dirt from the hub face, spacer and wheel mounting pad so every surface sits fully flush. Use a calibrated torque wrench and tighten in the correct star pattern to the vehicle or hardware manufacturer's specified value. Do not apply grease to mating faces, and only use thread treatment if the hardware instructions call for it.
After the first heat cycle and a short bedding-in drive, recheck wheel-bolt or wheel-nut torque at the interval specified by the spacer maker. This is particularly worthwhile after fresh wheels, brake work or new spacers, when coatings and mounting surfaces can settle.
Know when a spacer is the wrong answer
If you need a very thick spacer simply to make a wheel look acceptable, the wheel probably has the wrong offset for the car. If a thin spacer removes hub location, the correct solution may be a wheel with a different centre-bore arrangement or offset. And if the tyre already sits close to the arch, forcing the wheel outward will create rubbing rather than improve the build.
The best spacer setup is usually the least dramatic one that solves a verified fitment problem. Measure twice, match every dimension, use proven hardware and treat the first post-installation inspection as part of the job. That approach keeps your road car clean, your track car dependable and your wheel setup working as hard as it looks.